Elden Ring: Where to Find the Most Incredible Secret Locations
Elden Ring is filled with secret locations that you probably missed no matter how many hours you put into the game.

As we work our way through the slow days of the summer gaming season, it’s not exactly a surprise to learn that many people find themselves returning to Elden Ring. After all, it’s not just one of the best games of the year (possibly ever), but it’s the kind of open-world game filled with secret weapons, items, boss fights, and locations that you almost certainly missed during your first playthrough.
Today, we’re focusing on some of those secret areas. In a game as large and deep as Elden Ring, you could probably make an argument that any number of areas are actually secret areas. After all, everyone tends to experience Elden Ring in slightly different ways, which means that everyone will inevitably miss a few things that other players didn’t realize they happened to stumble upon.
That being the case, I’ve decided to focus on what I would consider some of Elden Ring‘s best overall secret areas. Some are filled with irreplaceable rewards while others are simply cool. Whatever the case may be, no trip through the Lands Between is complete without a stopover at some of these destinations.
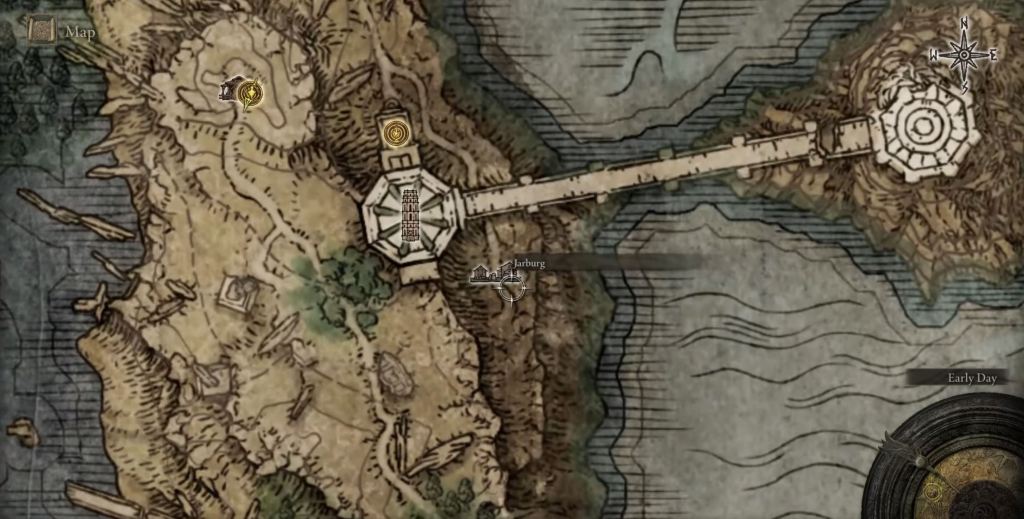
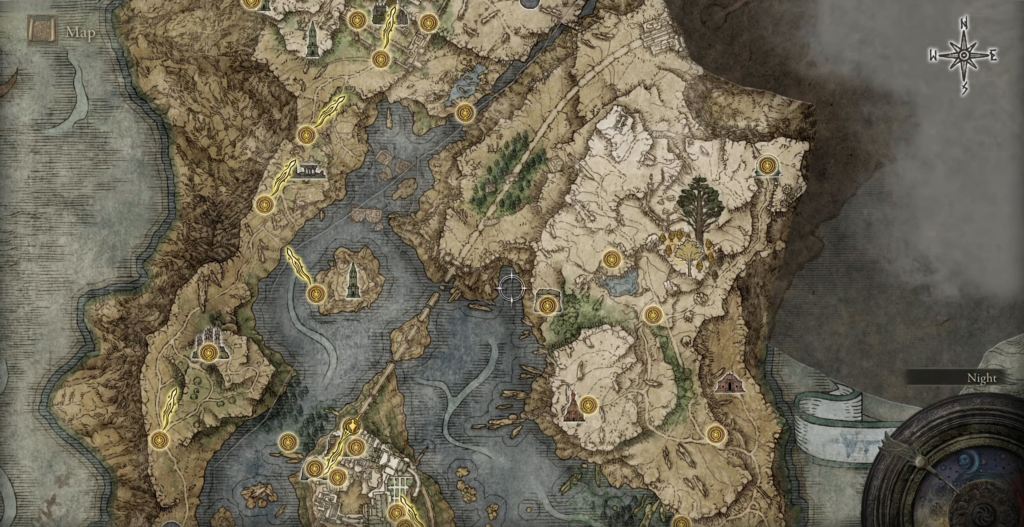
Elden Ring: How to Find Jarburg
Head to the Carian Study Hall, and ride alongside the nearby cliffs. There, you will find a series of descending platforms that you’ll just be able to safely reach. If you keep jumping down those platforms, you’ll eventually find the town of Jarburg and a nearby Site of Grace.
As the name implies, this village was once the home of the living jars you find throughout your Elden Ring adventure. While a shell of its former self, this village contains some fascinating bits of lore and serves as one of the primary locations for one of Elden Ring’s most memorable quests.
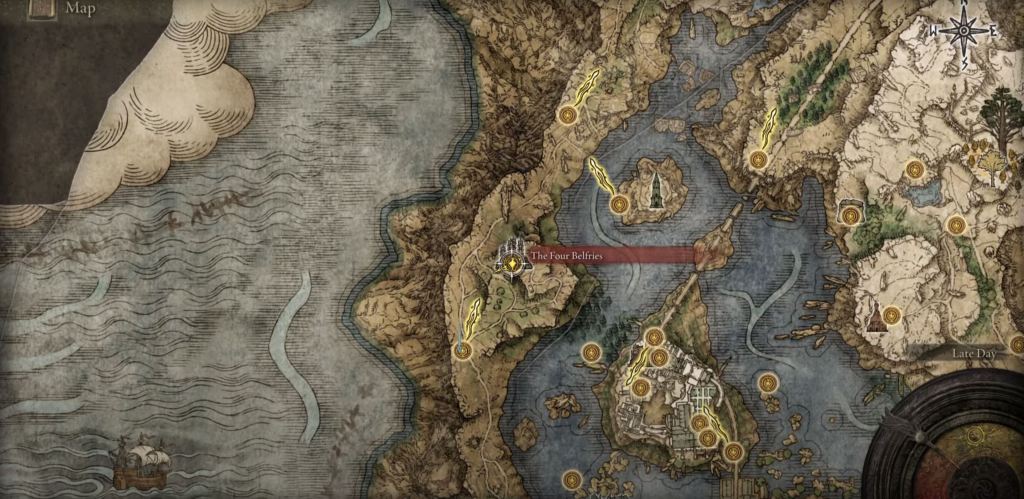
Elden Ring: How to Find the Chapel of Anticipation
While every Elden Ring player will visit the Chapel of Anticipation at least once (it’s the default starting area of the game after all), not every player will realize that it’s actually possible to return to that location later in the game.
To do so, you’ll first need to head to the Four Belfries in Liurnia of the Lakes. There, you will find some portals that can be opened with Stonesword Keys. Head down the hill from that location’s Site of Grace, and take a left. The first portal you find should take you back to the Chapel of Anticipation. There, you’ll get another shot at that boss that probably killed you the first time you encountered them.

Elden Ring: How to Find Inverted Carian Study Hall
Here’s a really weird area that is incredibly easy to miss despite the fact that so much work went into its design.
In order to access this area, you’ll need to start the long and complicated Ranni questline. While you don’t need to finish that questline, you will need to reach the point where Ranni hands you a small statue in exchange for the Fingerslayer Blade. This guide will help you reach that point. With that item in hand, head to the entrance of the Carian Study Hall and look for a nearby altar. Place the statue on that altar when prompted to do so.
From there, you’ll be able to navigate an inverted version of the Carian Study Hall (think Symphony of the Night). It’s a visually fascinating area that soon proves to be surprisingly difficult to properly navigate. You might want to save this one for later in the game.
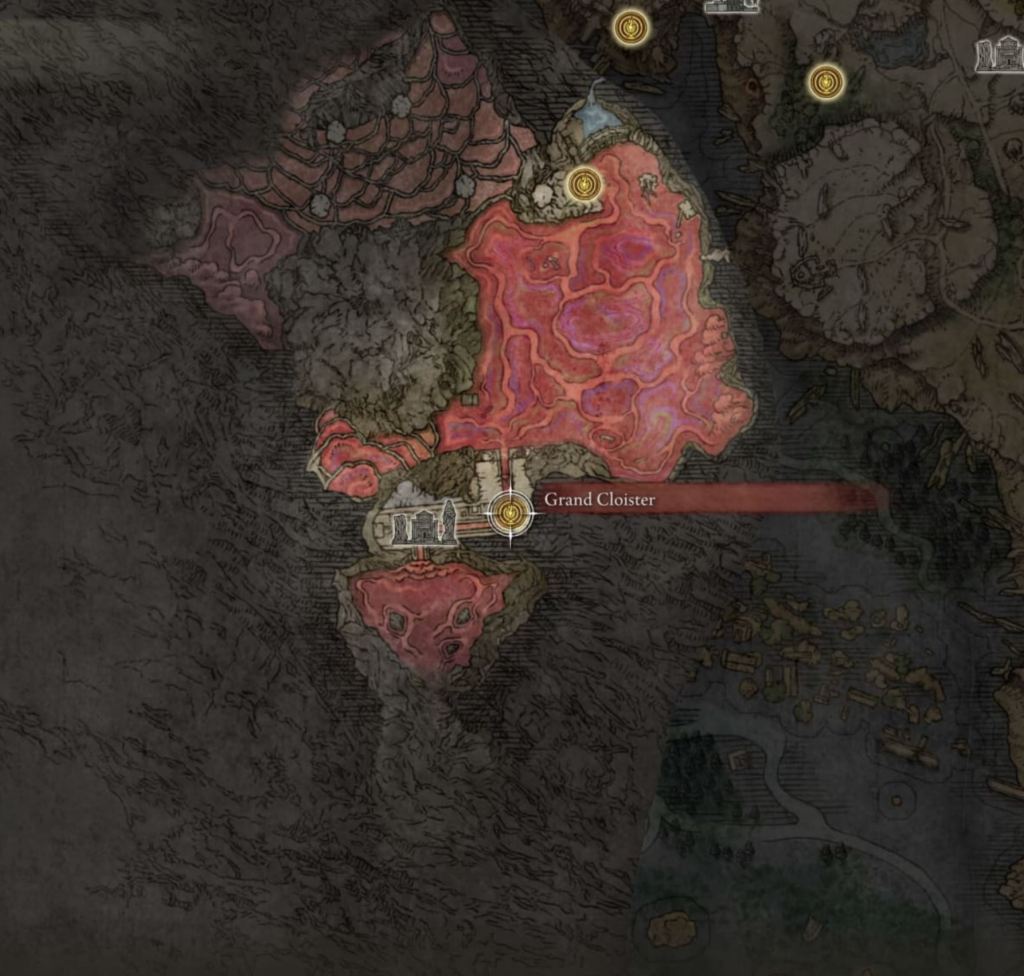
Elden Ring: How to Find Lake of Rot
Speaking of late in the game areas…
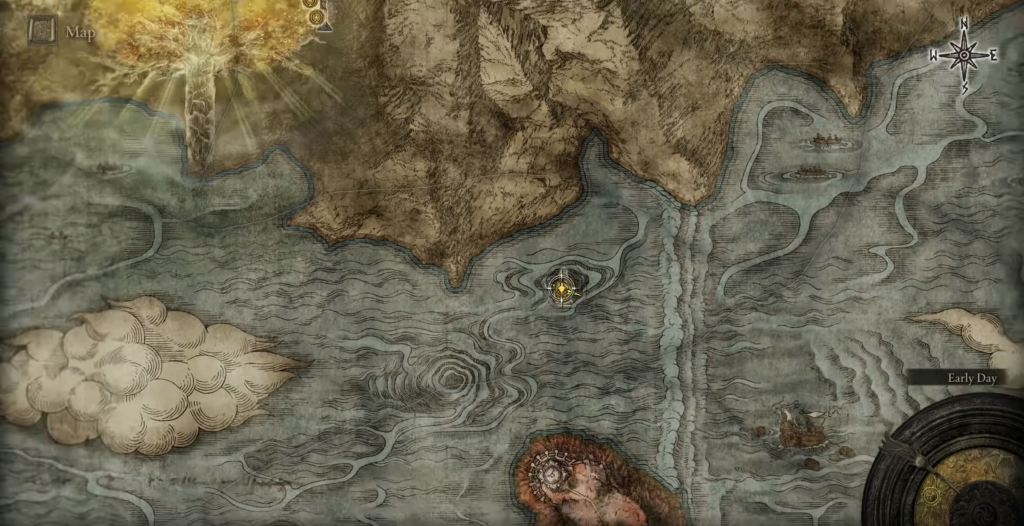
To reach the Lake of Rot, head to the Ainsel River Main Site of Grace. If you haven’t found that location yet, this guide will help point you in the right direction. Just know that it might take you quite a while to reach that Site of Grace if you’re not already on the path to the upper portions of the Ainsel River area.
Once you’ve reached that site of Grace, head to the nearby Uhl Palace Ruins. There, you’ll want to proceed through the gateway that is guarded by two massive statutes. Keep running downriver until you reach a fork in the road. There, take a right and keep following the river path.
Eventually, you’ll reach Nokstella, Eternal City. Head past the Site of Grace and proceed along the path that runs by the river. Powerful enemies patrol this area, so you’ll need to move carefully through it if you don’t want to get caught in a death loop. A little further down the river, you’ll see a small stairway leading to a tomb-like structure on your left. Head up those stairs and use the elevator you’ll find in that structure.
At the bottom of that elevator shaft, run straight through the only nearby door. Proceed southwest through a small cave and keep running through this claustrophobic, enemy-filled area. You’ll soon rhea an area filled with red mist where you’ll find another building on your fight that harbors another lift. Take that lift down, and you’ll find the Lake of Rot.
Congratulations! You’ve just found one of the biggest poison swamps in Soulsborne history as well as one of the most annoying boss fights in the game. While this area contains some incredible rewards, you’ll need every Scarlet Rot cleansing incantation and item you can find if you’re going to have a chance of surviving this hellscape. Good luck!
Elden Ring How to Find Subterranean Shunning-Grounds
This is one of those strange places in Elden Ring that is both easy to find and easy to miss depending on what kind of path you’ve taken through the game up until the point you can access it.
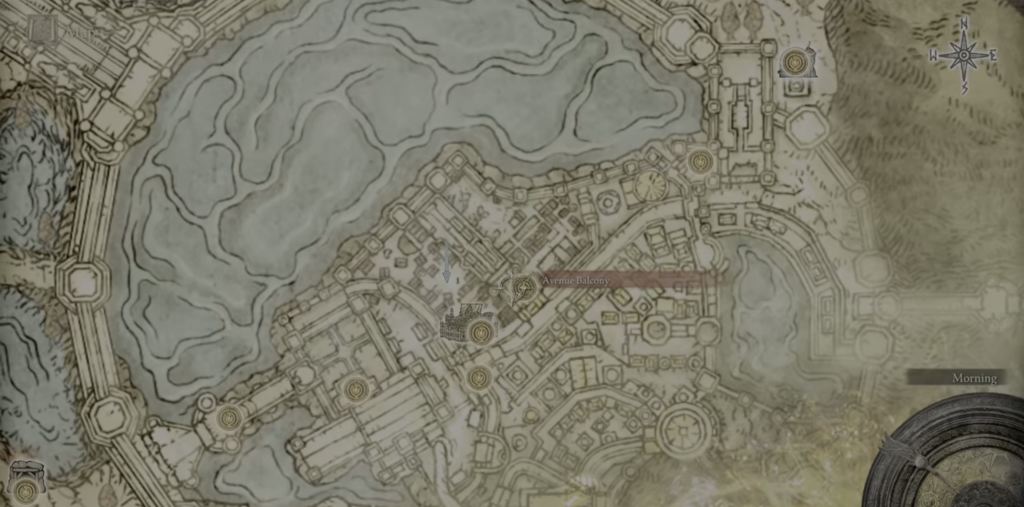
To find this area, head to the Avenue Balcony Site of Grace in Leyndell, Royal Capital. From there, head down the nearby stairs and take a left once you’ve reached the bottom. You should see some nearby rooftops on your left. Jump on those rooftops and jump down to the area below. Walk forward a bit, and you should see a well on your fight. Jump or climb down that well, and you’ll be at the Subterranean Shunning-Grounds.
This area’s Hellraiser-like name should give you a hint of what you’re in for. This place is dark, miserable, and filled with dangers. It also happens to feature quite a few additional secrets. As such, it’s a good idea to put up with the pain and really try to explore every corner of this nightmare location.
Elden Ring: How to Find the Statue of Radagon
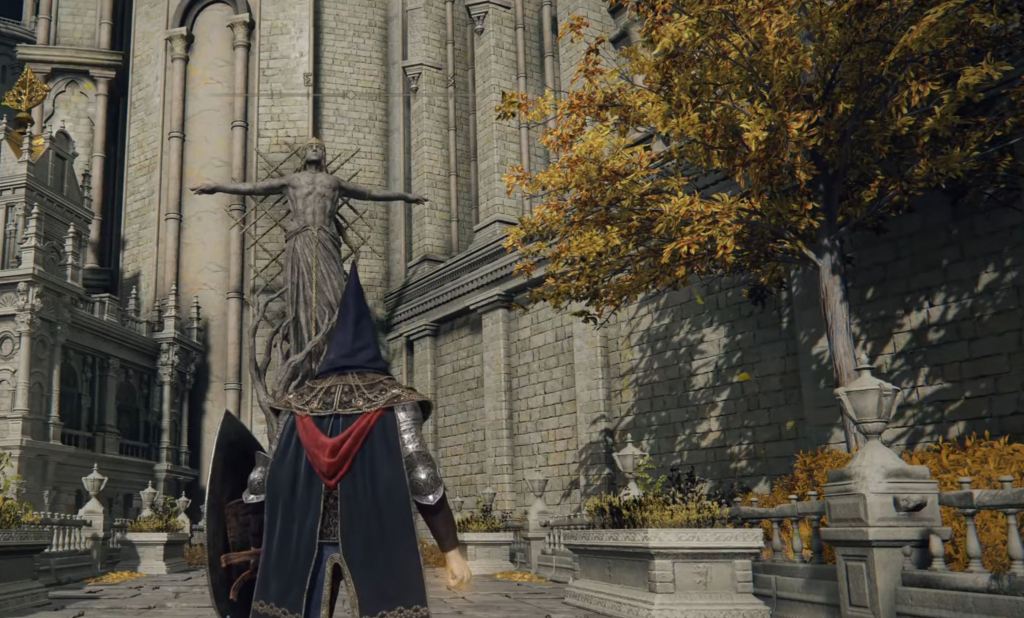
Go to the Erdtree Sanctuary Site of Lost Grace in Leyndell, Royal Capital. From there, walk down the curved stairs until you reach an elevator. At the bottom of that elevator, you’ll find a few foes and a massive statue of Radagon.
While the statue is visually impressive and certainly well-hidden, it turns out that it’s also the centerpiece of one of Elden Ring’s strangest puzzles. In order to solve the puzzle’s statue, you’ll need to find the nearby Golden Order Principia Prayerbook and give it to Corhyn or Miriel. Doing so will allow you to learn the Law of Regression Incantation. That incantation requires a Sacred Seal and a whopping 37 Intelligence points to cast, so you might need to respec your character in order to use it. When you’re ready, head back to the statue and cast your new incantation in front of it. If done correctly, the statue should disappear and reveal a hidden message that lore hunters are still deciphering.
Elden Ring: How to Find the Forsaken Depths/Cathedral of the Forsaken
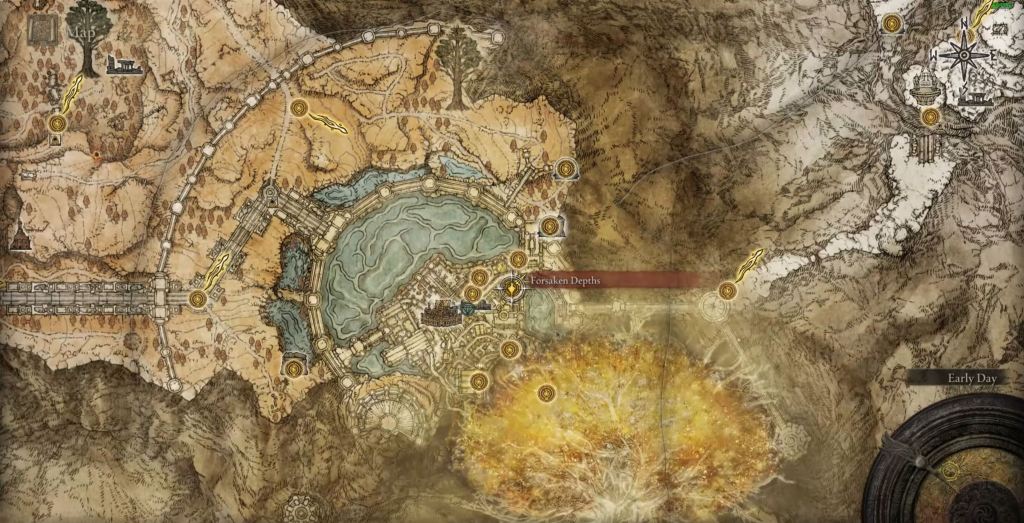
After you’ve accessed the Subterranean Shunning Grounds, head to the Underground Roadside Site of Grace. Proceed forward from there across the nearby bridge. After you cross the bridge, look for a pipe with a large hole in it. Jump on that pipe and into that hole.
Walk straight through the pipe until you see a path emerge on your left. Walk down that path, and take a right. Fall through the hole on this path and keep walking forward until you reach a ladder. Take the ladder down, and you’ll find an elevator. At the bottom of that elevator is a Site of Grace and the entrance to the Forsaken Depths.
If you manage to navigate the twisty and often illogical paths of the Forsaken Depths (this guide should help), you’ll eventually do battle with Mohg, The Omen. More importantly, you’ll have the chance to acquire the Fingerprint Stone Shield: a powerful defensive item that is perfect for some Strength-based builds.
Elden Ring: How to Find Isolated Tower
While not necessarily a “secret” location in the traditional sense, this out-of-the-way destination is one of those somewhat obscure Elden Ring areas you should certainly visit and can easily miss.
First off, while you will be able to reach this area fairly early in the game, you won’t be able to “do” anything at it until you’ve beaten Malenia. More importantly, how you reach the Isolated Tower will be partially determined by whether or not you’ve already beaten Maliketh.
If you have already beaten Maliketh, then head to the Merchant’s Shack Site of Grace. Southeast of there is a tower on a hill. Open the chest you’ll find in that tower, and you’ll be transported to a new location (the top of the Fortified Manor in Leyndell). Close to the nearby Site of Grace is a series of steps that lead to a sleeping Golem. Deal with the Golem however you’d like, and you’ll eventually run into a teleporter. That teleporter will take you to the Isolated Tower.
If you haven’t beaten Maliketh yet, then you can also head to the Fortified Manor, First Floor Site of Grace in order to eventually reach the Isolated Tower entrance. Walk through the main entrance hall from the Fortified Manor Site of Grace, and take the doorway to the left of the area’s front door. From there, turn left into the courtyard area and straight towards the large building ahead of you. Inside is an elevator that will take you to the Site of Grace near the sleeping giant mentioned above.
However, you get there, the Isolated tower is where you’ll activate the Great Rune you acquired from beating Malenia. In other words, you won’t be able to enter the tower until you’ve acquired that Great Rune.
Elden Ring: How to Find Frenzied Flame Village
To find this strange little area, go to the Grand Lift of Dectus Site of Grace. From there, head south through the nearby mountain pass. You should soon stumble upon a small village filled with some very angry villagers who are more than happy to attack you.
Essentially Elden Ring’s Village of the Crazies (Gymkata fans know), this place is filled with murderous figures who have clearly lost their minds. While you won’t find too much in the village or its surrounding areas outside of some XP, a few items, and perhaps a couple of small secrets, this is one of those destinations that is worth going out of your way to see if you really want to explore some of Elden Ring’s wildest optional areas. Those who explore every corner of this area may even discover what happened in the village…
Elden Ring: How to Find Sellia Hideaway
To find this area, head to the Church of the Plague Site of Grace. From there, go north up the nearby hill until you reach a wooden arch. Nearby is a small graveyard. Look for the large headstone in that graveyard. Behind it is an illusionary wall that leads into Sellia Hideaway.
This cave is a fantastic place to pick up some extra Smithing Stones, and it’s also where you’ll find the Crystal Torrent sorcery as well as the Crystal Spear. More importantly, you’ll need to go here eventually if you’re trying to complete Sellen’s questline, as this is where Master Lusat is hiding.
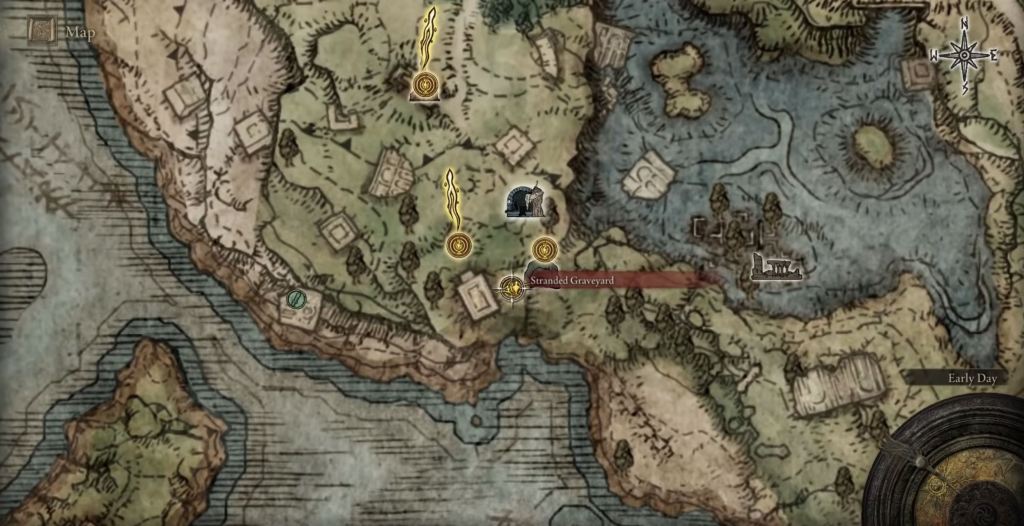
Elden Ring: How to Find Fringefolk Hero’s Cave
After completing Elden Ring’s mandatory opening, you’ll be allowed to properly explore the game’s open-world starting at a location simply known as the Stranded Graveyard. Most Elden Ring players probably assume there’s little point to ever returning to that area. However, that area actually contains a secret dungeon that is certainly worth going back to once you’re strong enough.
Once you have two Stonesword Keys and a few levels under your belt, go back to Stranded Graveyard. There, you will find a fog gate that can be opened with the aforementioned keys. Behind that wall is a dangerous dungeon patrolled by a chariot of death and some fairly strong enemies. However, this is also where you’ll find one of the best talismans in the game: the Erdtree’s Favor.
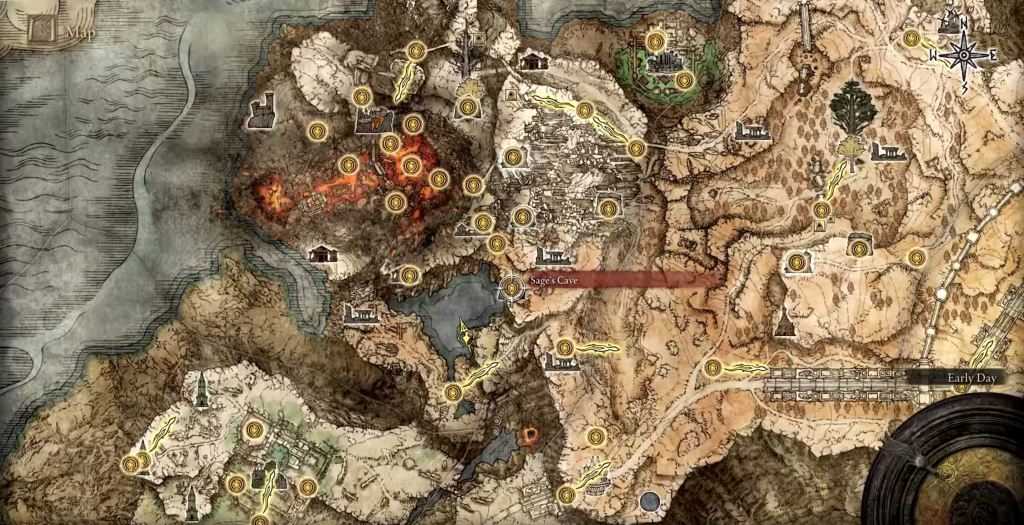
Elden Ring: How to Find Sage’s Cave
Go to the Abandoned Coffin Site of Grace near Caria Manor. From there, ride to the northeast so that you’re able to proceed through the nearby lake. In the northern part of the lake is a cave. While that cave looks like a dead end, that dead end is actually an illusionary wall. Hit that wall and proceed into the Sage’s Cave dungeon area.
This dungeon is deadly and filled with more illusionary walls, secret passages, and a ton of loot. Manage to make it to the end, and you’ll battle an annoying invisible boss who you’ll need to track by looking for the splashes they make in the nearby pool of water. Beat the boss, and you’ll unlock some incredible gear that is perfect for ranged players, assassins, or anyone who wants to rely on stealth from time to time.
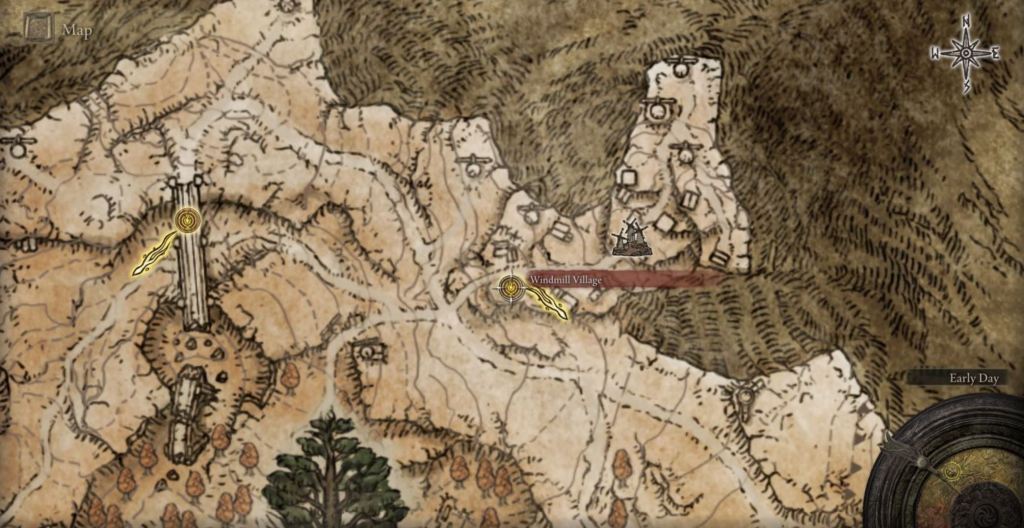
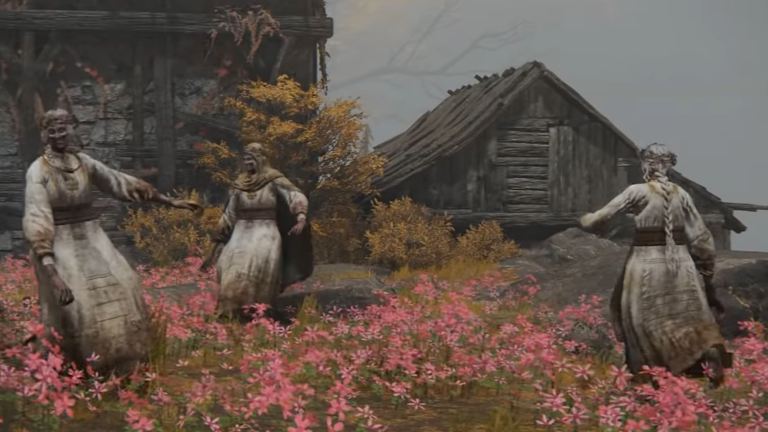
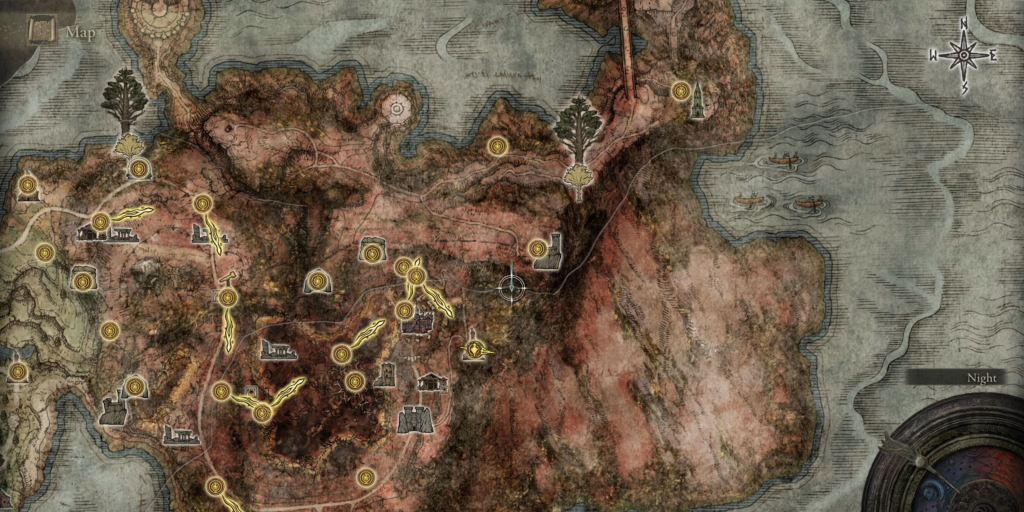
Elden Ring: How to Find Dominula, Windmill Village
If you’ve found the Road of Iniquity Side Path Site of Grace, head there and proceed down the nearby path to the southeast. When the road leads to the east, follow that path. Soon, you will find the absolute creepiest location in Elden Ring.
This village is essentially the village from Midsommar cranked up to about 11. It’s filled with dancing and decayed villagers who will swarm you if you interrupt their ceremony. Their “way too merry” celebrations and the false cheeriness of the town they live in have this way of getting under your skin. Make it through the village, though, and you’ll soon find yourself in a tough fight against the Godskin Apostle that happens to reward you with a powerful new sword.