Elden Ring: How to Play on “Easy Mode” Using These Broken Character Builds
Elden Ring's most broken character builds will leave you feeling like you've finally found the game's "Easy Mode."


Elden Ring may not feature a traditional “Easy Mode” option (despite increasingly louder calls for FromSoftware games to offer optional difficulty settings), but by choosing to play the game using one of the simply broken character builds that players have discovered so far, you will almost certainly be able to beat the game with relative ease.
While you can obviously beat Elden Ring using some of the other builds that we’ve previously recommended (or one of the many other viable character build options in this game), I need you to know that I’m not exaggerating when I say that the following builds are truly broken. Many of them take advantage of mechanics that are either among the most powerful in the game or interactions that are very likely not working as intended and typically lead to hilarious results.
So if you’re interested in making your Elden Ring journey as easy as possible (or if you just want to try something truly special for your second playthrough), here are a few Elden Ring builds that will leave you wondering why everyone says this game is so difficult.
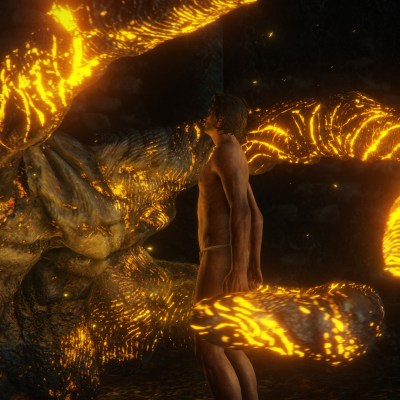
Elden Ring Easy Mode Builds: The Fire’s Deadly Sin Glitched Warrior
Build Requirements/Preferred Gear: Bloodflame Blade, Fire’s Deadly Sin, Seppuku, Eclipse Shotel, any melee weapon that can be buffed
There are a few variations of this basic build going around at the moment, but all of them will turn you into a living weapon that will be able to kill pretty much anything in your path just by getting somewhat close to it.
The heart of this build is the Fire’s Deadly Sin ability, which requires 19 Faith to cast. That ability is designed to allow you to set yourself on fire and deal flame damage to anything that gets near you, but it turns out that ability has a secret (and possibly unintended) interaction that allows you to add additional damage effects to the flames.
So, if you happen to use the Bloodflame Blade incantation on a compatible right-handed weapon while Fire’s Deadly Sin is active, the bleed effect that you get from that incantation will be passed on to the Fire’s Deadly Sin effect. That means that you’ll bathe yourself in flames that deal both fire and bleed damage whenever you get close enough to an enemy. If that’s not quite enough blood for you, you can also use the Seppuku Ash of War to add even more bleed damage to your weapon and increase the amount of bleed damage Fire’s Deadly Sin deals.
For PvP players, consider using Eclipse Shotel’s unique weapon skill (Death Flare) in conjunction with Fire’s Deadly Sin to greatly reduce the amount of time it takes to apply the instant-kill “Death” effect to your PvP foes. That build does require a greater stat investment (10 Strength, 25 Dexterity, and 30 Faith) to be used properly, but it’s absurdly powerful.
There are a few different talismans and weapons (such as those with natural bleed attributes) that will make this build even deadlier, but as long as you run some combination of a weapon buff ability with Fire’s Deadly Sin, it should allow you to deal extra damage via those flames (at least until this interaction is almost certainly fixed).
Elden Ring Easy Mode Builds: Erdtree Greatshield Turret
Build Requirements/Preferred Gear: Fire’s Deadly Sin, Erdtree Greatshield
This is actually a variation of the build mentioned above, which means you can either use it in conjunction with other Fire’s Deadly Sin combos or as the core of a slightly different style of build that emphasizes Strength, Endurance, and defense.
This build is designed around the Erdtree Greatshield, which comes with a unique ability that allows you to fire a projectile whenever you parry a spell with it. However, it turns out that if you set yourself on fire with Fire’s Deadly Sin and continue to “parry” that effect that you applied to yourself, you can actually shoot a projectile from this shield whenever you want.
That means that you can basically turn yourself into a nearly unkillable tank that can fire an almost endless volley of powerful magic projectiles from a safe distance. The advantage of going with this build over a traditional magic build is that it is generally much tougher, doesn’t require any FP, and costs relatively little stamina.
The only real downside to this build is that some enemies are so resistant to the damage you’ll deal with your shield that you may need to develop a backup plan that will allow you to handle those occasionally annoying fights. It also takes a while to acquire the Erdtree Greatshield itself, so you won’t be able to rely on this strategy until a little later in the game.
Still, this is about as safe as overpowered builds in this game get.
Elden Ring Easy Mode Builds: The Mage “One Shot” Build
Build Requirements/Preferred Gear: Terra Magicus, Cerulean Hidden Tear, Comet Azur, Lusat’s Glinstone Staff, Azur’s Glinstone Crown, Graven-School talisman, any additional spell damage items
Elden Ring players have recently been sharing incredible videos of themselves killing bosses via a magical beam that not only keeps some of the game’s toughest enemies at a safe distance but seemingly costs no FP to cast. Some suspected that overpowered magical beam had to be the result of a glitch, but it turns out you can fairly easily replicate that ability with the help of a few key items.
The core components of this build are Comet Azur, Terra Magicus, and Cerulean Hidden Tear. Once you have those items, you’ll want to acquire any additional gear that enhances the power of your Glinstone sorceries (which includes an upgraded version of Lusat’s Glinstone Staff, the Graven School talisman, and a ton of Intelligence points).
Once you have all the necessary pieces, you’re going to need to get within range of the target, cast Terra Magicus for an AOE damage buff, drink your flask with the Cerulean Hidden Tear mixed into it, and fire off the Comet Azur spell. That combo should result in you being able to fire a much stronger version of the Comet Azur spell for free (thanks to the Cerulean Hidden Tear effect) and keep the beam on an enemy until they are dead. Seriously, that combo will allow you to defeat some of the toughest enemies in Elden Ring in just a few seconds without giving them the chance to even get close to you.
Before you set your expectations too high, though, you should know that this build doesn’t really work on all enemies (especially bosses that are too quick, can’t be snuck up on, or have multiple phases that can’t be avoided), and it can only really be used once per fight/Site of Grace recharge due to the limited nature of the Cerulean Hidden Tear effect. However, it really is the best way to defeat some otherwise incredibly tough enemies (plus it’s a lot of fun to play with).
Elden Ring Easy Mode Builds: Sword of Night and Flame
Build Requirements/Preferred Gear: Sword of Night and Flame, Radagon’s Soreseal, Carian Filigreed Crest, Flame Grant Me Strength
We’ve previously talked about why the Sword of Night and Flame is one of the strongest weapons in Elden Ring, but one of the most impressive things about that inherently powerful sword is that it’s technically possible to get it very early in the game and use it throughout most of your adventure.
To pull this build off early, I recommend choosing a Confessor, Astrologer, or Prophet for your starting class. The Confessor may be easiest to use due to their generous starting stat distribution, but Prophet and Astrologer aren’t far off.
With your class picked, your first goal should be acquiring the Sword of Night and Flame as quickly as possible. You can actually grab this sword without beating a single boss, but you should know that the route you’re required to follow to acquire it that early into the game is dangerous and complicated. Fortunately, this video does a great job of showing you exactly how to follow it:
Once you have the sword, your next goal is to raise your character’s stats to the minimum levels required to properly wield it. That means you’ll need 12 Strength, 12 Dexterity, 24 Intelligence, and 24 Faith. That sounds like a lot (and it kind of is), but a Confessor should be able to hit those numbers around level 35. You can also utilize stat buffing talismans, or Great Rune effects, to artificially inflate those numbers before then, but you’ll want to hit them naturally at some point.
From there, you’re basically just going to rely on this sword’s overpowered fire and magic attacks to kill pretty much everything in the game with relative ease. Early enemies will not be able to stand up to even the base-level special attacks from this sword, and late-game enemies won’t fare much better once you’ve raised your stats a bit, upgraded the sword, and acquired some complementary pieces that will make you even stronger.
So far as that goes, you’re definitely going to want to grab the Carian Filigreed Crest at some point. That talisman reduces the FP cost of your weapon’s special skills, which is obviously quite valuable given how much you’ll be relying on this sword’s powerful magical attacks. You’ll also want to start raising your Vigor as soon as you’re able to equip the sword, and you’ll definitely want to acquire some more flask charges so that you can devote a few of them to replenishing your magic. From there, it’s all about upgrading the sword itself, raising your intelligence and Faith as you progress, and finding new ways to enhance your character’s survivability so that you’re able to pull off as many attacks as possible.
Even if you don’t decide to acquire the Sword of Night and Flame as quickly as possible, I really can’t say enough about how overpowered that weapon really is. It’s even worth respeccing your late-game character just to use it.
Elden Ring Easy Mode Builds: The Moonveil Sorcerer
Build Requirements/Preferred Gear: Moonveil, Lusat’s Glinstone Staff, Loretta’s Greatbow, Glinstone Pebble, Rock Sling, Carrion Greatsword, Radagon’s Soreseal, Carian Filigreed Crest
If the Sword of Night and Flame build just isn’t your thing or takes too long to make work, you might want to consider taking advantage of another broken Elden Ring weapon that you’ll be able to acquire early on: the Moonveil katana.
To use this build early, you’ll probably want to choose a Samurai or Prisoner as your starting class as they’re best equipped to use the Moonveil early on. As for the Moonveil itself, this guide will tell you where to acquire it and why it is so good.
Once you have the Moonveil…well, a lot of the work is honestly done. As long as you have 12 Strength, 18 Dexterity, and 23 Intelligence (which shouldn’t take long to acquire), you’ll be able to properly use Moonviel’s overpowered special ability (Transient Moonlight) to quickly strike with a magical slash attack that can punish enemies across surprisingly long distances and often go through barriers. This will be your default attack for much of the rest of the game.
You have quite a few options so far as complementary pieces go. Most players like carrying a staff with them (such as Lusat’s Glintstone Staff or the Meteorite Staff), but others prefer a nice bow or shield. If you go the staff route, I highly recommend equipping Loretta’s Greatbow, Glinstone Pebble, Rock Sling, and Carrion Greatsword (anything that grants you additional AOE damage is also valuable). If you’re interested, you can also combine this build with the one-shot mage build described above, though that will require quite a lot of work and quite a few additional stat points.
As for talismans, you’ll probably want to grab Radgon’s Soreseal at some point to increase your core stats, Carian Filigreed Crest to reduce the cost of your Moonveil strike, and whatever other talismans will either help strengthen your Moonveil attack, reduce the cost of that attack, or enhance your complementary casting abilities. Ancestral’s Spirit Horn is also a great option as it restores FP every time you defeat an enemy.
Really, though, the beauty of this build is that it’s as simple as it can possibly be. As long as you’re able to spam Moonveil’s attack, raise your stats appropriately, and slowly acquire better spells/gear as you progress, you’ll find that nothing really stays in your way for too long. If you just want to make Elden Ring as easy as possible as soon as possible, this may be your best overall option.
Elden Ring Easy Mode Builds: The Dual-Katana Bleed Build
Build Requirements/Preferred Gear: Two Uchigatana (or the Ash of War-compatible bleed weapons of your choice), Seppuku, Lord of Blood’s Exultation, Lost Ash of War, White Mask
A surprising number of enemies are vulnerable to bleed damage in Elden Ring, which is good news for us given that bleed damage in Elden Ring is more than a little overpowered at the moment.
There are many ways to make this build work (it basically depends on dual-weilding two weapons that cause bleed damage), but the easiest path to the final version of this build is to choose a Samurai as your starting class. Since they start the game with a bleed weapon (the Uchigatana) that means that they’re in the best position to acquire another Uchigatana as soon as possible. If you don’t want to play as a Samurai, you can ask a friend to drop an Uchigatana for you during co-op, use different bleed weapons, or just wait until a little later in the game when additional katanas that can be upgraded with Ashes of War become available.
Once you have your weapons, you’re going to want to eventually acquire the Seppuku Ash of War, duplicate it using a Lost Ashes of War item, and apply it to both weapons. It will take you quite a while to acquire that Ash of War, but just know that you can use a slightly less powerful version of this build up until that point as long as you have some of the other necessary pieces.
Speaking of which, you’re definitely going to want to find the Lord of Blood’s Exultation talisman, as it increases your attack power whenever anything near you loses blood (which is going to happen pretty much constantly). The Winged Sword Insignia and Radagon’s Soreseal are also nice additions to this build, but you do have quite a bit of flexibility available to you when it comes to your talisman choices outside of Lord of Blood’s Exultation.
If you really want to go all out with this build, I also highly recommend picking up the White Mask, which also enhances your attack power whenever blood loss occurs. It’s not essential, but it is nice.
In any case, the basic idea behind this build is that you’re going to use Seppuku to buff the inherent bleed damage of both of your weapons, and then use the rest of your equipment loadout to buff your bleed damage output further. With all the pieces assembled, you should find that you’re able to quickly attack enemies and pull off numerous bleed procs that will drain most health pools in no longer than a few minutes. This build works on most bosses, a ton of regular enemies, and it also shines in PvP scenarios.
While it takes quite a while to get the most out of this build, you really can run lesser versions of it until you acquire the enhancement pieces. At worst, you’ll just be doing slightly less damage and may need to occasionally rely on alternate tactics to carry you into the middle portion of the game.
Elden Ring Easy Mode Builds: Mimic Tear and…Pretty Much Anything
There is one item I’ve neglected to mention in all of the builds we’ve talked about so far despite the fact that it’s an essential component of nearly all of them: The Mimic Tear Spirit Ash.
The Mimic Tear summons a copy of yourself for a mere investment of 660 HP. That copy comes equipped with all of the gear and items you have on you when you summon it, and it can even heal itself and copy your attack patterns. That also means that you can do things like equip a bow when you summon the Mimic so that it attacks from a distance while you get in close (or vice versa).
While it will take you a while to acquire this summon and properly upgrade it, using it is honestly about as close as Elden Ring gets to a straight-up easy mode (at least in scenarios where you’re able to summon the mimic). My upgraded Mimic Tear has tanked some of the toughest bosses in the game and allowed me to safely get in the kind of damage that wouldn’t have been possible without it.
It’s true that the Mimic Tear tends to work better for melee builds with high defenses, big health pools, and slow, powerful weapons (it’s also incredibly powerful with the bleed build described above), but pretty much everybody will benefit from using this summon as often as possible.