Cuphead DLC: How to Solve the Graveyard Puzzle and Unlock a Secret Boss Fight
Cuphead's The Delicious Last Course DLC features a secret boss fight, a tricky graveyard puzzle, and an item that actually makes the game even harder than before.

Cuphead: The Delicious Last Course may be short (early community estimates suggest it can be beaten in five hours if you’re good enough), but that doesn’t mean the DLC isn’t the perfect follow-up to one of the best action games of the last several years or that its boss fights are anything less than the absolute best. Actually, Cuphead‘s first and only DLC add-on happens to feature a secret boss fight that many players will surely miss.
Yes, if you’re the kind of Cuphead player who is able to breeze through the game’s collection of ridiculously tough boss fights and are always looking for a little more, The Delicious Last Course happens to contain a secret encounter that will surely offer you that something extra you crave.
In a fascinating twist, though, the hardest thing about that secret boss fight isn’t beating it but rather unlocking it. Even better, those who do unlock and overcome that secret battle will acquire an item that actually manages to make Cuphead‘s other boss fights more difficult than ever.
Cuphead: The Delicious Last Course – How to Find the Graveyard Puzzle Solution
In order to unlock Delicious Last Course‘s secret boss fight, you’ll first need to unlock the “Howling Aces” region of the overworld map. Reaching that area will require you to beat the DLC’s first two bosses (Glumstone the Giant and Mortimer Freeze or Moonshine Mob and Esther Winchester, depending on which route you take). All of those bosses are obviously pretty tough, but you should be able to beat them and reach that area fairly early into the game.
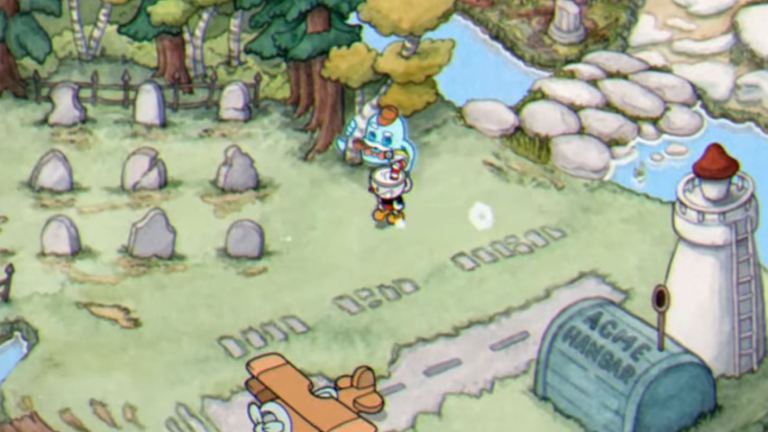
Once you’re able to access the Howling Aces region, look for a small graveyard area on the overworld map that contains nine tombstones. Standing near those tombstones is a ghostly detective who strongly suggests the graveyard harbors some kind of mystery. It turns out that it does, but you won’t be able to solve it quite yet.
Instead, you’ll want to head to the nearby shop and purchase the newly-available Broken Relic item. Once you have it, walk towards Glumstone the Giant’s region, and keep an eye out for three climbers standing on a ranked podium. Speak to each of them, and they’ll tell you the story of their adventure.
This is where things get tricky. The stories they tell contain hints that indicate which tombstones you need to interact with in that graveyard and the order to trigger them in. The problem is that those hints (and the “tombstone order” they reveal) are random for each player. So, if you see another player suggest that there is a definitive order you need to trigger the tombstones in, don’t listen to them. You may get lucky and get the same order they did, but it’s more likely that your solution will be slightly different.
Instead, the best thing to do is to keep an eye out for the positional “keywords” the climbers use when telling their stories. So, if the first place climber says their opponents were “left down at the bottom,” they’re likely telling you that you’ll first need to interact with the tombstone in the bottom left of the graveyard. If the second-place climber mentions getting “up right at the crack of dawn,” that could mean that the second tombstone you need to interact with is the uppermost one to the far right. The third might mention that it “ain’t right they came in third,” which means that the third tombstone is one of the ones to the very right.
Again, this part of the puzzle can be difficult simply because there is no set solution and the clues are so oddly phrased. Ultimately, though, you need to know that each climber’s position on the podium corresponds to the order you need to interact with the tombstones in, and that the only words that really matter in their dialog are the ones that indicate a specific direction (no matter what the context is).
For what it’s worth, it also seems like the climber’s hints are all relative to the middle tombstone. In other words, always start and reset at the middle tombstone. If the first climber mentions the directions “up and right,” go up and to the right from the middle tombstone and interact with that tombstone first. If the second just mentions the word “left,” interact with the tombstone immediately to the left of the center one. I haven’t had the chance to extensively test this theory with every available clue, but every clue I’ve seen so far seems to suggest that the best thing to do is to reset your position at the center tombstone before following the next set of directions.
Once you think you’ve got the solution, equip the Broken Relic and interact with the tombstones in the order you think is correct. If you did everything right, the middle tombstone will glow, and you’ll be able to interact with it. Doing so will send you to the secret boss fight against the Angel and Devil. That’s where the fun really begins.
Cuphead: The Delicious Last Course – How to Defeat the Angel and Devil Secret Boss Fight and Acquire the Cursed Relic
Cuphead‘s secret boss fight isn’t quite as challenging as you might think it would be, but the battle against the Angel and Devil is certainly one of the most unique encounters in the game.
Basically, whichever figure you’re currently looking at will always be the Devil. The Angel figure will always be behind you. The Devil is also the only one of the figures that can directly deal and take damage. The Angel’s projectiles are actually harmless so long as you’re not facing them. However, the moment you turn around to look at the Angel’s projectiles (which can happen quite often) they morph into Devil projectiles and will be able to hurt you.
That dynamic is further complicated by a beam of light that both bosses will occasionally shoot through the arena. If the Angle fires the beam, it won’t hurt you as long as you’re facing the Devil. If the Devil fires it (or you turn to look at the beam that was fired by the Angel and turn it into a Devil beam in the process), then the beam can hurt you. On top of all of that, you’ve got to deal with a floating cloud that moves throughout the arena and produces a damage-dealing bolt of lightning.
It’s all a little weird, but the whole fight is basically about positioning. The only time you need to worry about the Angel’s projectiles is if you’re about to face them and turn them into Devil projectiles. However, you can occasionally exploit that same dynamic. For instance, if the Devil fires a projectile you can’t jump over, you can always put your back to it and render it harmless. It’s all about being aware of the current state of the arena’s projectiles and putting yourself in a position to deal as much damage to the Devil as possible.
Beating the Angel and Devil will turn the Broken Relic you just bought into the Cursed Relic. Equipping that item not only reduces your HP to 1 during boss fights, but it randomizes your charms and weapons each time you attack. Consider it Cuphead‘s version of a “Very Hard” mode. It doesn’t seem that there is any reward for using this item, but we’ll be sure to update you if anyone discovers additional information about it!